Save Files with the Druid Connector Host
The Save File integration task enables the DRUID Connector Host to save files uploaded by users in the chat to a specified local disk or network location accessible by the host machine.
Prerequisites
Before setting up the Read File integration:
- Upgrade the Connector Host to version 9.0 or higher.
- If you have Connector Host 9.3 or higher, in the installation parameters, select Use local files, then enter the path where the connector can access the files.
- Locate and open the appsettings.json file.
- Add or update the following parameters:

For previous versions, update the appsettings.json file on the machine where the Connector Host is installed:
"ENABLE_FILEMANAGER": "true",
"FILEMANAGER_ALLOWED_PATHS": ["<enter the root path here>","<another root path>"],
The FILEMANAGER_ALLOWED_PATHS array should include all root paths you want the Connector Host to access for reading or saving files. E.g., “C:\\fd”.
"ENABLE_FILEMANAGER": "true",
"FILEMANAGER_ALLOWED_PATHS": [“C:\\fd”],
Save a single file from the Conversation
To configure the Save File integration for saving a single file:
- Go to the desired connector action configuration page.
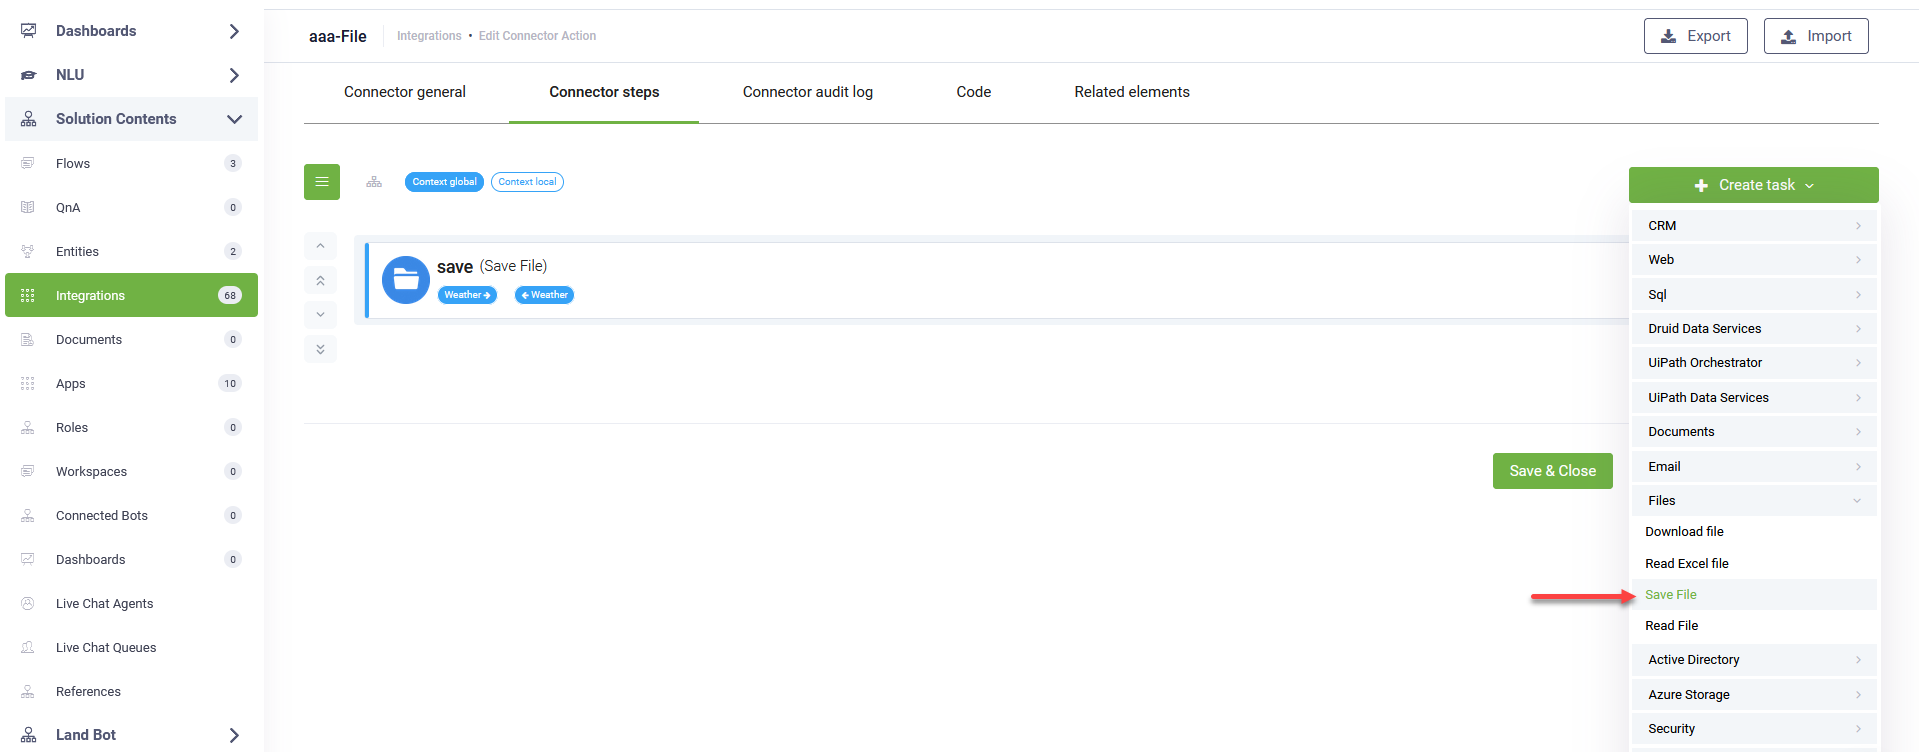
- Click on the Connector steps tab.
- In the top-right corner, click Create task > Files > Save File.
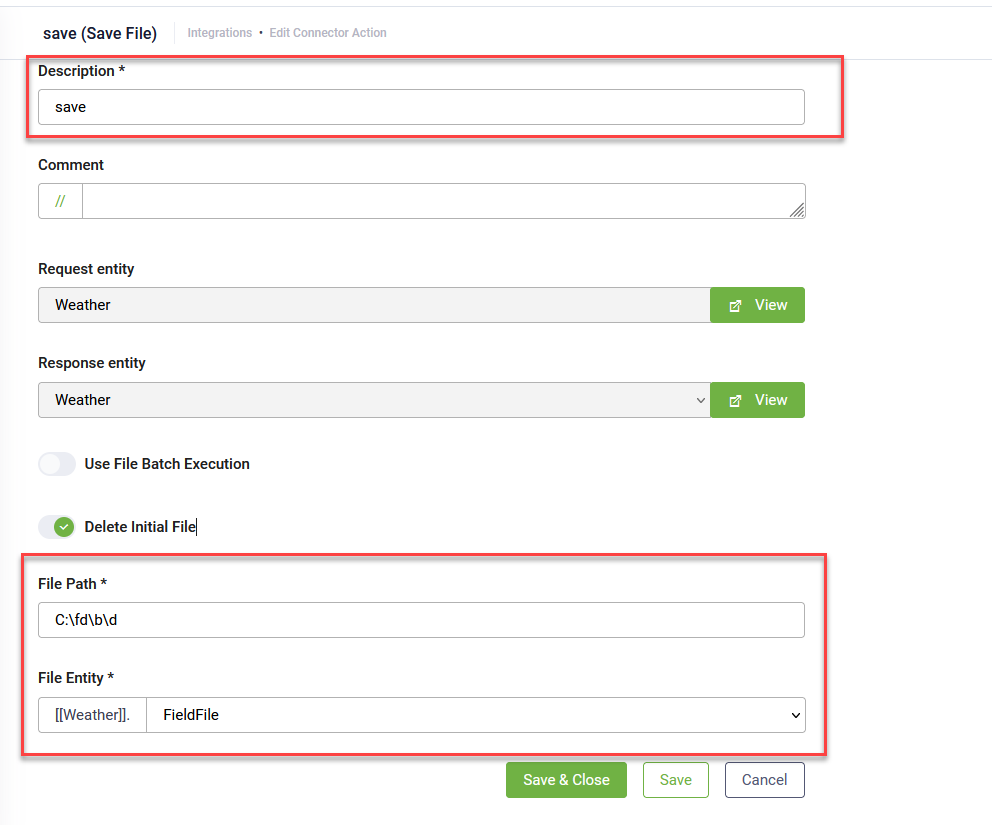
- Provide a short description for the task.
- In the File Path field, enter the destination path where you want to save the file (e.g., C:\fd). Do not use quotation marks.
- From the File Entity field, select the entity file-field that stores the file you want to save.
- Optional: The file is saved both to your specified path and to the connector's temporary file storage folder (configured during installation in the Document generator section, under the File Storage Folder parameter). To automatically remove the file from the connector's temporary storage after it's saved to your specified file path, tap on Delete Initial File. The connector file storage is regularly auto-cleared, but this option provides immediate removal.
- Save and close the integration.
- Publish the integration.
Save files in bulk from a conversation
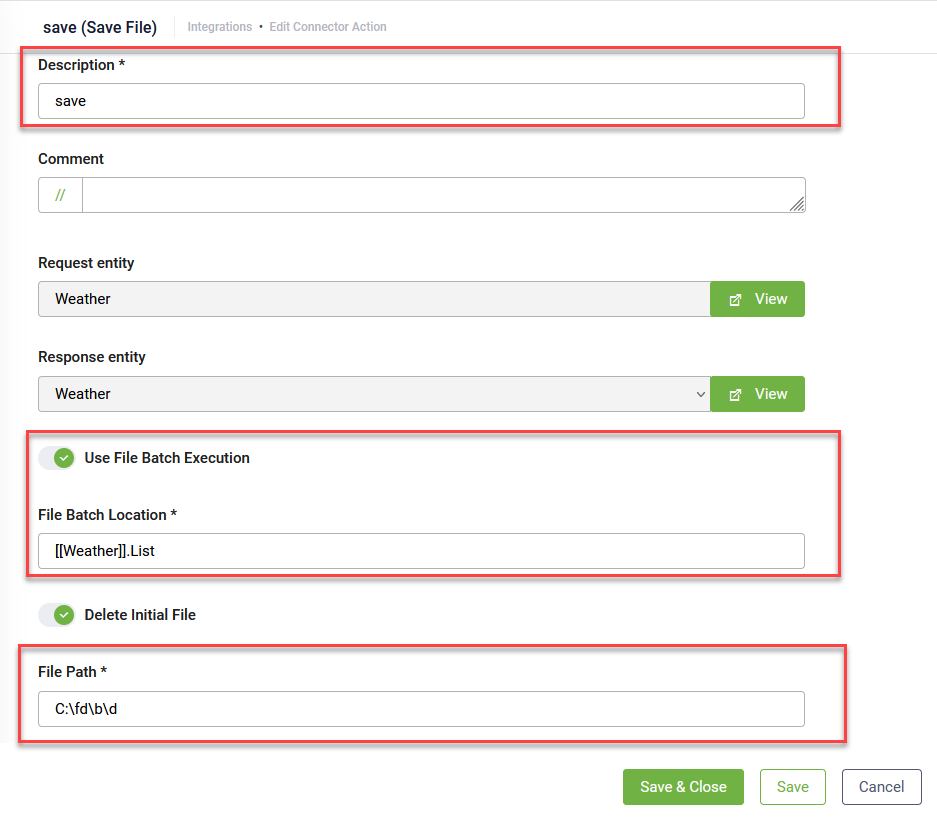
To configure the Save File integration for saving multiple files:
- Go to the desired connector action configuration page.
- Click on the Connector steps tab.
- In the top-right corner, click Create task > Files > Save File.
- Provide a short description for the task.
- Tap on Use File Batch Execution.
- From the File Batch Location field, select the entity list of type file that stores the list of files you want to save.
- In the File Path field, enter the destination path where you want to save the files (e.g., C:\fd). Do not use quotation marks.
- Optional: The file is saved both to your specified path and to the connector's temporary file storage folder (configured during installation in the Document generator section, under the File Storage Folder parameter). To automatically remove the file from the connector's temporary storage after it's saved to your specified file path, tap on Delete Initial File. The connector file storage is regularly auto-cleared, but this option provides immediate removal.
- Save and close the integration.
- Publish the integration.